Space Shooter
Overview
Walkthrough
Initialize the Project
Begin by creating a new project called space-shooter:
turbo init space-shooterThis initializes a Rust project with the following structure:
space-shooter/ # Your project's root directory.
├── src/ # The directory of your code.
│ └── lib.rs # The main file for the game.
├── Cargo.toml # Rust project manifest.
└── turbo.toml # Turbo configuration. Setup the turbo.toml
With the project initialized, open the turbo.toml and change the height of the [canvas] property. This will adjust the aspect ratio and resolution of the game.
[canvas]
width = 256
height = 144
height = 512You can also change the description and authors properties while here.
Add Sprite and Audio Assets
Inside your project directory, create a folder named sprites and a folder named audio. These folders will contain all of the game's sprites and audio files.
space-shooter/ # Your project's root directory.
├── audio/ # The directory of your audio assets.
├── sprites/ # The directory of your sprite assets.
├── src/ # The directory of your code.
│ └── lib.rs # The main file for the game.
├── Cargo.toml # Rust project manifest.
└── turbo.toml # Turbo configuration.Add the following files to the audio folder:
Add the following files to the sprites folder:
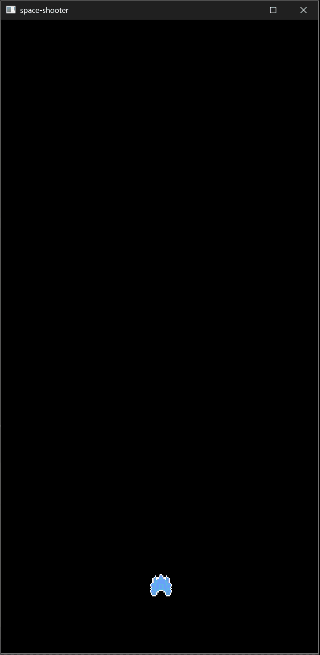
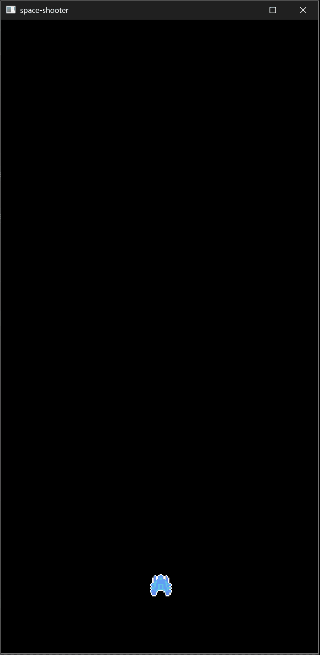
Player Sprites
Enemy sprites
Game State Initialization
Add this code to the top of your lib.rs file.
use turbo::*;
#[turbo::game]
struct GameState {
}
impl GameState {
fn new() -> Self {
Self {
}
}
fn update(&mut self) {
self.draw();
}
fn draw(&self) {
}
}We haven't added any structs or data yet, but we will soon.
All we did so far is set up a draw() function to keep our drawing and updating logic separate. This helps keep our code organized as we start adding more complex logic.
Set Up Project Structure
To manage the size of this project, we will utilize sub files to organize our code. Sub files must be accessible throughout the project, so we will set up a model for files to reference each other.
Create a new folder named model inside the src/ folder in your project directory and create two files inside it, player.rs and mod.rs.
space-shooter/ # Your project's root directory.
├── audio/ # The directory of your audio assets.
├── sprites/ # The directory of your sprite assets.
├── src/ # The directory of your code.
│ ├── model/ # The directory for sub files.
│ │ └── mod.rs # A reference to all sub files in this folder.
│ │ └── player.rs # A sub file to contain the Player struct.
│ └── lib.rs # The main file for the game.At the top of the lib.rs file, add the following lines:
use turbo::*;
mod model;
pub use model::*; This code allows lib.rs to reference any files mod.rs references.
Add the following code to the mod.rs file:
use super::*;
mod player;
pub use player::*;This code allows mod.rs to reference both lib.rs and player.rs, in turn allowing lib.rs to access player.rs as well.
Whenever we create a new subfile we have to add mod and use statements to mod.rs.
Finally, add the following line to the top of player.rs
use super::*;This lets the subfile reference everything defined in mod.rs, including definitions in lib.rs like GameState, because mod.rs includes a use super::* as well.
Now that the project is set up, we can start defining our game structs!
Player
We'll start by creating a Player Struct and adding some variables to update and draw it.
Copy the following code into the player.rs file:
use super::*;
#[turbo::serialize]
pub struct Player {
pub hitbox: Bounds,
x: f32,
y: f32,
dx: f32, // dx and dy used for velocity
dy: f32,
pub hp: u32,
pub hit_timer: u32, // used for invincibility frames and drawing
shoot_timer: u32, // used for rate of fire
shooting: bool, // used for shooting animation
// variables used by the HUD to display information
pub score: u32,
}
impl Player {
pub fn new() -> Self {
let x = ((screen().w() / 2) - 8) as f32;
let y = (screen().h() - 64) as f32;
Player {
// Initialize all fields with default values
hitbox: Bounds::new(x, y, 16, 16),
x,
y,
dx: 0.0,
dy: 0.0,
hp: 3,
hit_timer: 0,
shoot_timer: 0,
shooting: false,
score: 0,
}
}
pub fn update(&mut self) {
}
pub fn draw(&self) {
}
}These are all the variables we need to track the player as they move and shoot onscreen.
We also outline new(), update() and draw() functions. These will be common functions across our game structs.
We call new() when we want to create a new instance of this struct, in this case during initialization of the GameState, and call update() and draw() once per frame in the GameState update() scope.
Updating and Drawing the Player
Next, we will add some code to the update() and draw() functions of the Player struct.
This code will handle player movement and rendering the player sprite.
Replace the empty functions in the player.rs file with the following functions:
pub fn update(&mut self) {
if self.hp > 0 {
// Player movement
let deceleration = 0.9; // Adjust this value to control deceleration speed
self.dx *= deceleration; // Reduce xy delta by deceleration factor
self.dy *= deceleration;
// Record keyboard input
let mut x_input = 0.0;
let mut y_input = 0.0;
if gamepad::get(0).up.pressed() {
y_input = -1.0;
}
if gamepad::get(0).down.pressed() {
y_input = 1.0;
}
if gamepad::get(0).left.pressed() {
x_input = -1.0;
}
if gamepad::get(0).right.pressed() {
x_input = 1.0;
}
// Apply input to dx and dy, normalizing diagonal movement
let magnitude = ((x_input * x_input + y_input * y_input) as f32).sqrt();
if x_input != 0.0 {
self.dx = x_input / magnitude;
}
if y_input != 0.0 {
self.dy = y_input / magnitude;
}
let speed = 2.0;
self.x = (self.x + self.dx * speed) // Translate position by input delta multiplied by speed
.clamp(0.0, (screen().w() - self.hitbox.w() - 2) as f32); // Clamp to screen bounds
self.y = (self.y + self.dy * speed)
.clamp(0.0, (screen().h() - self.hitbox.h() - 2) as f32);
// Set hitbox position based on float xy values
self.hitbox = self.hitbox.position(self.x, self.y);
}
}pub fn draw(&self) {
if self.hp > 0 {
// Get reference to SpriteAnimation for player
let anim = animation::get("p_key");
// Begin to construct the string for which sprite to use
let mut sprite = "player".to_string();
// Assign the sprite string to the SpriteAnimation
anim.use_sprite(&sprite);
sprite!(
animation_key = "p_key",
x = self.x,
y = self.y,
);
}
}Great! The Player struct is now ready to be used in the game.
Our final step before seeing it in action is to return to our lib.rs file to add a player variable to the GameState struct and call these functions we've just defined!
use turbo::*;
mod model;
pub use model::*;
#[turbo::game]
struct GameState {
player: Player,
}
impl GameState {
fn new() -> Self {
Self {
player: Player::new(),
}
}
fn update(&mut self) {
self.draw();
self.player.update();
}
fn draw(&self) {
self.player.draw();
}
}After saving all your changes, return to the Turbo game window to fly your player ship around! Use the arrow keys to move. Try changing the speed and deceleration values to find what feels best.
Projectiles
Now that we have a start on our player controller, let's add projectiles for it to shoot!
We'll start by creating a new file in our model folder called projectile.rs and reference it in mod.rs.
space-shooter/ # Your project's root directory.
├── audio/ # The directory of your audio assets.
├── sprites/ # The directory of your sprite assets.
├── src/ # The directory of your code.
│ ├── model/ # The directory for sub files.
│ │ └── mod.rs # A reference to all sub files in this folder.
│ │ └── player.rs # A sub file to contain the Player struct.
│ │ └── projectile.rs # A sub file to contain the Projectile struct.
│ └── lib.rs # The main file for the game.use super::*;
mod player;
pub use player::*;
mod projectile;
pub use projectile::*; Copy the following code into the new projectile.rs file:
use super::*;
// Enum to determine who fired the projectile
#[turbo::serialize]
#[derive(PartialEq)]
pub enum ProjectileOwner {
Enemy,
Player,
}
#[turbo::serialize]
pub struct Projectile {
pub hitbox: Bounds,
x: f32,
y: f32, // use f32s to track xy positions for more precise movement
pub velocity: f32,
angle: f32,
anim_key: String, // unique, randomly generated key to be used for SpriteAnimations
pub collided: bool, // Used to control the sprite and update state
pub destroyed: bool, // Used to remove projectile from game
pub damage: u32,
pub projectile_owner: ProjectileOwner,
}
impl Projectile {
pub fn new(x: f32, y: f32, velocity: f32, angle: f32, projectile_owner: ProjectileOwner) -> Self {
let audio = match projectile_owner {
ProjectileOwner::Enemy => "projectile_enemy",
ProjectileOwner::Player => "projectile_player",
};
audio::play(audio);
Projectile {
// Initialize all fields with default values
hitbox: Bounds::new(x, y, 6, 6),
x,
y,
velocity,
angle,
anim_key: random::u32().to_string(),
destroyed: false,
collided: false,
damage: 1,
projectile_owner,
}
}
pub fn update(&mut self, player: &mut Player) {
}
pub fn draw(&self) {
}
}Once again, we outline all the variables we will need to update and draw our projectiles.
Unlike the Player, when we create a new() Projectile we call audio::play() to play a sound effect, determined by the projectile_owner.
Updating and Drawing Projectiles
Now we can fill out our update() and draw() functions for the Projectile struct like we did for Player:
pub fn update(&mut self, player: &mut Player) {
// If the projectile hasn't collided, update it as normal
if !self.collided {
// update projectile position
let radian_angle = self.angle.to_radians();
self.x += self.velocity * radian_angle.cos();
self.y += self.velocity * radian_angle.sin();
// flag the projectile to be destroyed if it goes off screen
if self.y < -(self.hitbox.h() as f32)
&& self.x < -(self.hitbox.w() as f32)
&& self.x > screen().w() as f32
&& self.y > screen().h() as f32
{
self.destroyed = true;
}
// if the projectile has collided,
} else {
// get reference to the SpriteAnimation of the projectile
let anim = animation::get(&self.anim_key);
// flag projectile as destroyed when the hit animation is done
if anim.done() {
self.destroyed = true;
}
}
// Set hitbox position based on float xy values
self.hitbox = self.hitbox.position(self.x, self.y);
}pub fn draw(&self) {
// Get reference to SpriteAnimation for projectile
let anim = animation::get(&self.anim_key);
// Begin to construct the string for which sprite to use
let owner = match self.projectile_owner {
ProjectileOwner::Enemy => "enemy",
ProjectileOwner::Player => "player",
};
if !self.collided {
anim.use_sprite(&format!("projectile_{}", owner));
} else {
anim.use_sprite(&format!("projectile_{}_hit", owner));
anim.set_repeat(0);
anim.set_fill_forwards(true);
}
sprite!(
animation_key = &self.anim_key,
x = self.x,
y = self.y
);
}Integrate Projectiles into the Game
Now that the Projectile struct is ready, we can integrate it into our game!
First, return to lib.rs and create a projectiles variable in the GameState struct.
Then, add a loop for the GameState to update and draw all projectiles in the update() function.
use turbo::*;
mod model;
pub use model::*;
#[turbo::game]
struct GameState {
player: Player,
projectiles: Vec<Projectile>,
}
impl GameState {
fn new() -> Self {
Self {
player: Player::new(),
projectiles: vec![],
}
}
fn update(&mut self) {
self.draw();
self.player.update();
self.projectiles.retain_mut(|projectile| {
projectile.update(&mut self.player);
!projectile.destroyed
});
}
fn draw(&self) {
self.player.draw();
for projectile in self.projectiles.iter() {
projectile.draw();
}
}
}The GameState now has a vec, or list, of projectiles.
Every projectile we create in the game will be added to this list so that the GameState can then update and draw them.
But, we still need to add projectiles to this list! Time to return to our Player struct and add shooting functionality.
Add a parameter to the update() function and paste the following code at the end:
pub fn update(&mut self, projectiles: &mut Vec<Projectile>) {
...
// Set hitbox position based on float xy values
self.hitbox = self.hitbox.position(self.x, self.y);
// Shooting projectiles
// check if shoot button is pressed
if gamepad::get(0).start.pressed() || gamepad::get(0).a.pressed() {
self.shooting = true; // flag shooting state for animation
// if shoot timer is 0, shoot a projectile
if self.shoot_timer == 0 {
let fire_rate = 15;
self.shoot_timer += fire_rate; // add cooldown to shoot timer
let projectile_speed = 5.0;
for i in 0..=1 {
projectiles.push(
Projectile::new(
self.x + i as f32 * 13.0,
self.y - 8.0,
projectile_speed,
-90.0,
ProjectileOwner::Player,
)
);
}
}
// if not shooting
} else {
self.shooting = false; // flag shooting state for animation
}
// decrement shoot timer
self.shoot_timer = self.shoot_timer.saturating_sub(1);
}
}While we're editing the Player struct, let's modify its draw function to swap sprites when shooting:
pub fn draw(&self) {
// Get reference to SpriteAnimation for player
let anim = animation::get("p_key");
// Begin to construct the string for which sprite to use
let mut sprite = "player".to_string();
if self.shooting {
sprite.push_str("_shooting");
}
// Assign the sprite string to the SpriteAnimation
anim.use_sprite(&sprite);
// Draw sprite
sprite!(
animation_key = "p_key",
x = self.x,
y = self.y,
);
}Now, if the shooting bool is true, we add "_shooting" to the end of our sprite string, making it "player_shooting".
Finally, we need to update the call to the Player's update() function in lib.rs in order to pass our projectile list:
self.player.update()
self.player.update(&mut self.projectiles); Save all your work, and you should now be able to shoot projectiles in the game window by pressing Space or Z!
Play around with the values for fire_speed and projectile_speed to give the game your own spin.
Enemies
Now that we have a framework for combat, it's time to add enemies!
Start once again by creating a new file in our model folder called enemy.rs and reference it in mod.rs.
space-shooter/ # Your project's root directory.
├── audio/ # The directory of your audio assets.
├── sprites/ # The directory of your sprite assets.
├── src/ # The directory of your code.
│ ├── model/ # The directory for sub files.
│ │ └── enemy.rs # A sub file to contain the Enemy struct.
│ │ └── mod.rs # A reference to all sub files in this folder.
│ │ └── player.rs # A sub file to contain the Player struct.
│ │ └── projectile.rs # A sub file to contain the Projectile struct.
│ └── lib.rs # The main file for the game.use super::*;
mod enemy;
pub use enemy::*;
mod player;
pub use player::*;
mod projectile;
pub use projectile::*;Copy the following code into the new enemy.rs file:
use super::*;
// Different types of enemies
#[turbo::serialize]
#[derive(PartialEq)]
pub enum EnemyType {
Meteor,
Shooter,
Tank,
Turret,
Zipper,
}
#[turbo::serialize]
// Struct for Enemies
pub struct Enemy {
enemy_type: EnemyType,
pub hitbox: Bounds,
x: f32,
y: f32,
pub angle: f32,
pub hp: u32,
hit_timer: u32, // used for hit animation
pub destroyed: bool,
}
impl Enemy {
// Initialize different enemy types with different properties
pub fn new(enemy_type: EnemyType) -> Self {
let (x,y) = ((random::u32() % screen().w()).saturating_sub(32) as f32, -32.0);
// Set initial properties based on enemy type
Self {
enemy_type: enemy_type,
hitbox: Bounds::new(x, y, 16, 16),
x,
y,
angle: 0.0,
hp: 8,
hit_timer: 0,
destroyed: false,
}
}
pub fn update(&mut self, projectiles: &mut Vec<Projectile>) {
}
pub fn draw(&self) {
}
}Again, we outline the struct for updating and drawing.
This time, we add some logic to the new() function to randomly position enemies when we spawn them.
And we include a destroyed bool, like we do with projectiles.
The EnemyType enum will be used to add variety to our enemies in the future.
For now, we will only implement one simple enemy, the Turret variant.
Updating and Drawing Enemies
Same as before, fill out the blank update() and draw() functions:
pub fn update(&mut self, projectiles: &mut Vec<Projectile>) {
// Move down
let speed = 0.5;
self.y += speed;
// Random chance to fire projectile
if random::u32() % 250 == 0 {
// Create and shoot projectiles from enemy towards the player
projectiles.push(Projectile::new(
self.x + (self.hitbox.w() as f32 * 0.5) - (self.hitbox.w() as f32 * 0.5),
self.y + (self.hitbox.h() as f32),
2.5,
90.0,
ProjectileOwner::Enemy,
));
}
// Flag to destroy if moved offscreen
if self.y > (screen().h() + self.hitbox.h()) as f32 {
self.destroyed = true;
}
// Set hitbox position based on float xy values
self.hitbox = self.hitbox.position(self.x, self.y);
}pub fn draw(&self) {
// Construct the string for which sprite to use
let sprite = match self.enemy_type {
EnemyType::Tank => "tank",
EnemyType::Shooter => "shooter",
EnemyType::Turret => "turret",
EnemyType::Zipper => "zipper",
EnemyType::Meteor => "meteor",
};
// Draw sprite
sprite!(
&sprite,
x = self.hitbox.x(),
y = self.hitbox.y(),
);
}Integrate Enemies into the Game
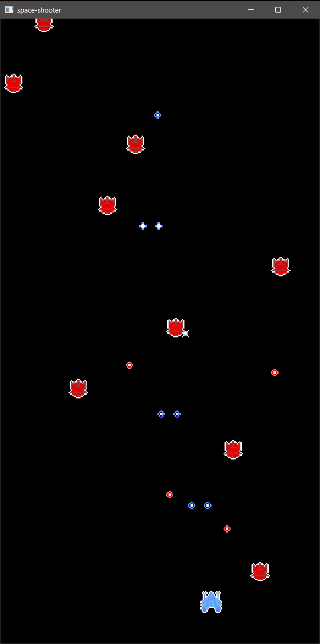
Now we have an Enemy struct that updates and draws, so let's add some logic to the GameState to spawn them on an interval and call those functions.
First, add new properties to the GameState, then define a functions to spawn enemies.
Then, call the spawning function, as well as updating and drawing all spawned enemies.
use turbo::*;
mod model;
pub use model::*;
#[turbo::game]
struct GameState {
player: Player,
enemies: Vec<Enemy>,
projectiles: Vec<Projectile>,
}
impl GameState {
fn new() -> Self {
Self {
player: Player::new(),
enemies: vec![],
projectiles: vec![],
}
}
fn update(&mut self) {
self.draw();
self.player.update(&mut self.projectiles);
self.spawn_enemies();
self.enemies.retain_mut(|enemy| {
enemy.update(&mut self.projectiles);
!enemy.destroyed
});
self.projectiles.retain_mut(|projectile| {
projectile.update();
!projectile.destroyed
});
}
fn draw(&self) {
self.player.draw();
for enemy in self.enemies.iter() {
enemy.draw();
}
for projectile in self.projectiles.iter() {
projectile.draw();
}
}
fn spawn_enemies(&mut self) {
let spawn_rate = 100;
// Spawn a new enemy if the tick is a multiple of the spawn rate and there are less than 24 enemies already spawned
if time::tick() % spawn_rate == 0 && self.enemies.len() < 24 {
// Spawn a new Turret enemy
self.enemies.push(
Enemy::new(EnemyType::Turret)
);
}
}
}Save all your work, and you should see a swarm of enemies flooding your game window!
The last step to finishing our combat system is to check for collisions between ships and projectiles, and manage their hit points!
Collisions and HP
Before we register collisions between ships and projectiles, we'll define damage functions for the Player and Enemy structs.
Add these functions inside of the impl scope for each struct:
pub fn take_damage(&mut self, damage: u32) {
self.hp = self.hp.saturating_sub(damage); // reduce HP by damage amount
camera::shake(5.0); // camera shake
self.hit_timer = 30; // invincibility frame timer and drawing flag
}pub fn take_damage(&mut self, player: &mut Player, damage: u32) {
// reduce HP by damage amount and set hit timer for hit effect
self.hp = self.hp.saturating_sub(damage);
self.hit_timer = 15; // frames to show hit effect
// Destroy enemy and increase player score if hp is 0
if self.hp == 0 {
self.destroyed = true;
player.score += 20;
}
}Also add these lines to the end of the Player update() and Enemy update() functions:
self.hit_timer = self.hit_timer.saturating_sub(1);
// Remove the camera shake
if self.hit_timer == 0 {
camera::remove_shake();
}self.hit_timer = self.hit_timer.saturating_sub(1);These functions will decrease hp values for both Player and Enemy when called.
Player will shake the camera, while Enemy will flag destroyed and increase the Player's score.
Both structs have a hit_timer variable we will use for animating a damaged state, which needs to be decreased every frame.
Now we can expand our Projectile struct. Add some logic to check for collisions, and call these damage functions:
pub fn update(&mut self, player: &mut Player, enemies: &mut Vec<Enemy>) {
// If the projectile hasn't collided, update it as normal
if !self.collided {
// update projectile position
let radian_angle = self.angle.to_radians();
self.x += self.velocity * radian_angle.cos();
self.y += self.velocity * radian_angle.sin();
// flag the projectile to be destroyed if it goes off screen
if self.y < -(self.hitbox.h() as f32)
&& self.x < -(self.hitbox.w() as f32)
&& self.x > screen().w() as f32
&& self.y > screen().h() as f32
{
self.destroyed = true;
}
// Checking for collisions with player or enemies based on projectile owner
match self.projectile_owner {
// Check collision with player
ProjectileOwner::Enemy => {
if self.hitbox.intersects(&player.hitbox)
&& player.hp > 0
&& player.hit_timer == 0 { // player doesn't have i-frames
player.take_damage(self.damage);
audio::play("projectile_hit");
self.collided = true;
}
}
// Check collision with enemies
ProjectileOwner::Player => {
for enemy in enemies.iter_mut() {
if self.hitbox.intersects(&enemy.hitbox) && !enemy.destroyed {
enemy.take_damage(player, self.damage);
audio::play("projectile_hit");
self.collided = true;
break; // Exit loop after first collision
}
}
}
}
// if the projectile has collided,
} else {
// get reference to the SpriteAnimation of the projectile
let anim = animation::get(&self.anim_key);
// flag projectile as destroyed when the hit animation is done
if anim.done() {
self.destroyed = true;
}
}
// Set hitbox position based on float xy values
self.hitbox = self.hitbox.position(self.x, self.y);
}And for our last step, return to lib.rs to update the call to our projectiles' update() function:
fn update(&mut self) {
self.draw();
self.player.update(&mut self.projectiles);
self.spawn_enemies();
self.enemies.retain_mut(|enemy| {
enemy.update(&mut self.projectiles);
!enemy.destroyed
});
self.projectiles.retain_mut(|projectile| {
projectile.update(&mut self.player, &mut self.enemies);
!projectile.destroyed
});
}Save everything, and click back into your game window. Move around, shoot some enemies, and take some damage.
Game State Machine
Now that our core gameplay is running, let's add some logic to set up a start and end, and a way to replay the game.
Start by creating a new enum in lib.rs and properties in GameState:
use turbo::*;
mod model;
pub use model::*;
#[turbo::serialize]
#[derive(PartialEq)]
enum Screen {
Menu,
Game,
}
#[turbo::game]
struct GameState {
screen: Screen,
start_tick: usize,
player: Player,
enemies: Vec<Enemy>,
projectiles: Vec<Projectile>,
}
impl GameState {
fn new() -> Self {
Self {
screen: Screen::Menu,
start_tick: 0,
player: Player::new(),
enemies: vec![],
projectiles: vec![],
}
}
...We'll use this enum to manage what we call in our update() scope, and the tick keeps track of when the game started for future timing logic:
fn update(&mut self) {
self.draw();
// Menu
if self.screen == Screen::Menu {
if gamepad::get(0).start.just_pressed() || gamepad::get(0).a.just_pressed() {
self.screen = Screen::Game; // transition scene
self.start_tick = time::tick();
}
// Game
} else {
self.player.update(&mut self.projectiles);
self.spawn_enemies();
self.enemies.retain_mut(|enemy| {
enemy.update(&mut self.projectiles);
!enemy.destroyed
});
self.projectiles.retain_mut(|projectile| {
projectile.update(&mut self.player, &mut self.enemies);
!projectile.destroyed
});
// Game Over
if self.player.hp == 0 {
if gamepad::get(0).start.just_pressed() || gamepad::get(0).a.just_pressed() {
*self = GameState::new();
}
}
}
}Now our game has a simple, built-in loop. Let's just add some text to show the player what's happening. Add this function to the impl scope of GameState:
fn draw_screen(&self) {
// If in menu or game over state
if self.screen == Screen::Menu || self.player.hp == 0 {
// Determine title string
let title =
if self.screen == Screen::Menu { "SPACE SHOOTER" }
else { "GAME OVER" };
// Draw title
text!(
&title,
x = (screen().w() as i32 / 2) - (title.chars().count() as i32 * 4),
y = (screen().h() as i32 / 2) - 16,
font = "large"
);
// Draw prompt to start game, blinking every half second
if time::tick() / 4 % 8 < 4 {
text!(
"Press A or Start",
x = (screen().w() as i32 / 2) - 38,
y = (screen().h() as i32 / 2) + 8,
);
}
}
}And lastly, call the new function at the end of GameState's draw() function:
fn draw(&self) {
self.player.draw();
for projectile in self.projectiles.iter() {
projectile.draw();
}
for enemy in self.enemies.iter() {
enemy.draw();
}
self.draw_screen();
}Displaying Game Info
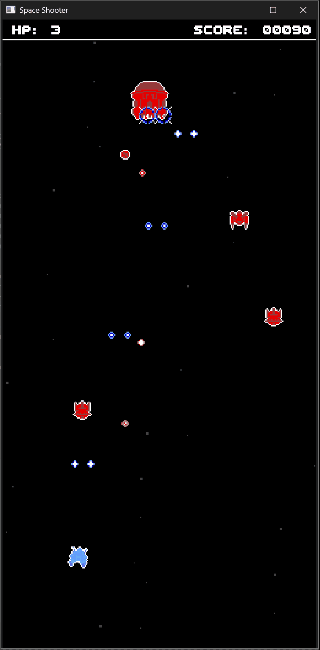
Next, let's give the player some info about their status by adding a simple heads up display! We'll create a UI to display the player's HP, score, and notifications.
Before we get to drawing, add some properties in the Player struct to store notifications:
#[turbo::serialize]
pub struct Player {
pub hitbox: Bounds,
x: f32,
y: f32,
dx: f32, // dx and dy used for velocity
dy: f32,
pub hp: u32,
pub hit_timer: u32, // used for invincibility frames and drawing
shoot_timer: u32, // used for rate of fire
shooting: bool, // used for shooting animation
// variables used by the HUD to display information
pub score: u32,
notifications: Vec<String>,
notification_timer: usize,
}
impl Player {
pub fn new() -> Self {
let x = ((screen().w() / 2) - 8) as f32;
let y = (screen().h() - 64) as f32;
Player {
// Initialize all fields with default values
hitbox: Bounds::new(x, y, 16, 16),
x,
y,
dx: 0.0,
dy: 0.0,
hp: 3,
hit_timer: 0,
shoot_timer: 0,
shooting: false,
score: 0,
notifications: vec![
"Use arrow keys to move.".to_string(),
"Press SPACE or A to shoot.".to_string(),
"Defeat enemies and collect powerups.".to_string(),
"Try to not die. Good luck!".to_string(),
],
notification_timer: 0,
}
}This vec and usize timer will keep track of the notifications we'll display to the player.
The list will act as a queue, where the first element is displayed, and the timer will increment whenever the queue is not empty.
Add the following lines to the end of the Player update() function:
pub fn update(&mut self, projectiles: &mut Vec<Projectile>) {
...
self.hit_timer = self.hit_timer.saturating_sub(1);
// Remove the camera shake
if self.hit_timer == 0 {
camera::remove_shake();
}
// Notifications timer
if self.notifications.len() > 0 {
self.notification_timer += 1;
// Remove current notification if timer expires
if self.notification_timer >= 120 - 1 {
self.notification_timer = 0;
let _ = self.notifications.remove(0);
}
}
}This scope runs when there are notifications to display, increasing the notifications timer, resetting it and removing the first displayed notification from the list.
We aren't going to send any notifications in this tutorial, but you could use them when significant events happen in the game, like if the player finds a new power up or gets an achievement.
Now we can create a function to draw all of our heads up display information!
Add the following function to the impl scope of the Player struct:
pub fn draw_hud(&self) {
let hud_height = 16; // Height of the HUD panel
let hud_padding = 4; // Padding inside the HUD
// Background rectangle
rect!(
x = -1,
y = -1,
w = screen().w() + 2,
h = hud_height + 2,
border_size = 1,
color = 0x000000ff,
border_color = 0xffffffff,
);
// Display Health
let health_text = format!("HP: {}", self.hp);
text!(
&health_text,
x = hud_padding,
y = hud_padding,
font = "large",
color = 0xffffffff
);
// Display Score
let score_text = format!("SCORE: {:0>5}", self.score);
let score_text_x = // anchor to the right side of the screen
screen().w() as i32 - (score_text.chars().count() as i32 * 8) - hud_padding;
text!(
&score_text,
x = score_text_x,
y = hud_padding,
font = "large",
color = 0xffffffff
);
// Draw notifications
for notif in self.notifications.iter() {
// center the text based on width of characters
let len = notif.chars().count();
let w = len * 5;
let x = (screen().w() as usize / 2) - (w / 2);
rect!(
x = x as i32 - 4,
y = 24 - 2,
w = w as u32 + 4,
h = 12,
color = 0x5fcde4ff
);
text!(
¬if,
x = x as i32,
y = 24,
font = "medium",
color = 0xffffffff
);
break;
}
}This function simply uses rect!()s and text!()s with some math for centering to display information already stored in the Player struct.
So now that we have all our info in one place, we can call our new function in the GameState's draw() function:
fn draw(&self) {
self.player.draw();
for projectile in self.projectiles.iter() {
projectile.draw();
}
for enemy in self.enemies.iter() {
enemy.draw();
}
self.player.draw_hud();
self.draw_screen();
}Save your files and check your game window for a more informed playthrough!
Conclusion
Wow. After all that code, you have a playable game loop with a solid foundation. Great work!
We created Player, Enemy, and Projectile structs, are updating and drawing them using the GameState, checking for collisions between them all, and organized 400+ lines of code into easily readable sub files!
Next Steps
- Add more enemy types. Give them new sprites and movement patterns.
- Create power-ups for the player to collect
- Change the
speed,fire_rateorenemy.hpto personalize the game - Use
turbo -exportto export your game and host it on the web